
How to Protect Your Home from Bushfire.
How Bushfires Affect Homes
When planning for bushfire protection, it’s important to understand that not all threats are the same.
Bushfire Attack Levels (BAL) are used to describe the level of exposure a home may face from the three main bushfire elements:

Ember Attack

Radiant Heat

Direct Flame
The Problem Most Older Homes Face
For new builds, homes are designed and constructed to meet a specific BAL rating from the ground up.
But many homes in bushfire-prone areas were constructed before current BAL requirements were introduced, and may not be adequately protected
- Had your local area reclassified into a higher BAL rating
- Purchased a home in a bushfire-prone area
- Or seen fire activity increase
There’s a good chance your home isn’t as protected as it could be.
That’s where targeted upgrades come in.
Where Homes Are Most Vulnerable
In a bushfire situation, most homes will fail at the weakest points.
Embers, heat and flame don’t attack evenly. They find gaps, openings and vulnerable areas in the building envelope.
For existing homes, improving bushfire protection isn’t about rebuilding. It’s about strengthening these weak points as best you can and/or is practical.

What Level of Protection Are You Working Towards?
BAL 19
BAL 29
BAL 40
BAL FZ
The house diagram below highlights common weak points on a home, how those areas relate to bushfire exposure, and what upgrades can help you move closer to your target BAL level.
Please note: Bushfire protection should be considered as part of an overall plan for your home and property. Targeted upgrades can help, but regular garden maintenance, vegetation management and clearing debris are also important. Always seek appropriate professional advice and follow the recommendations of your local fire or bushfire service.
Explore Each Area of Your Home
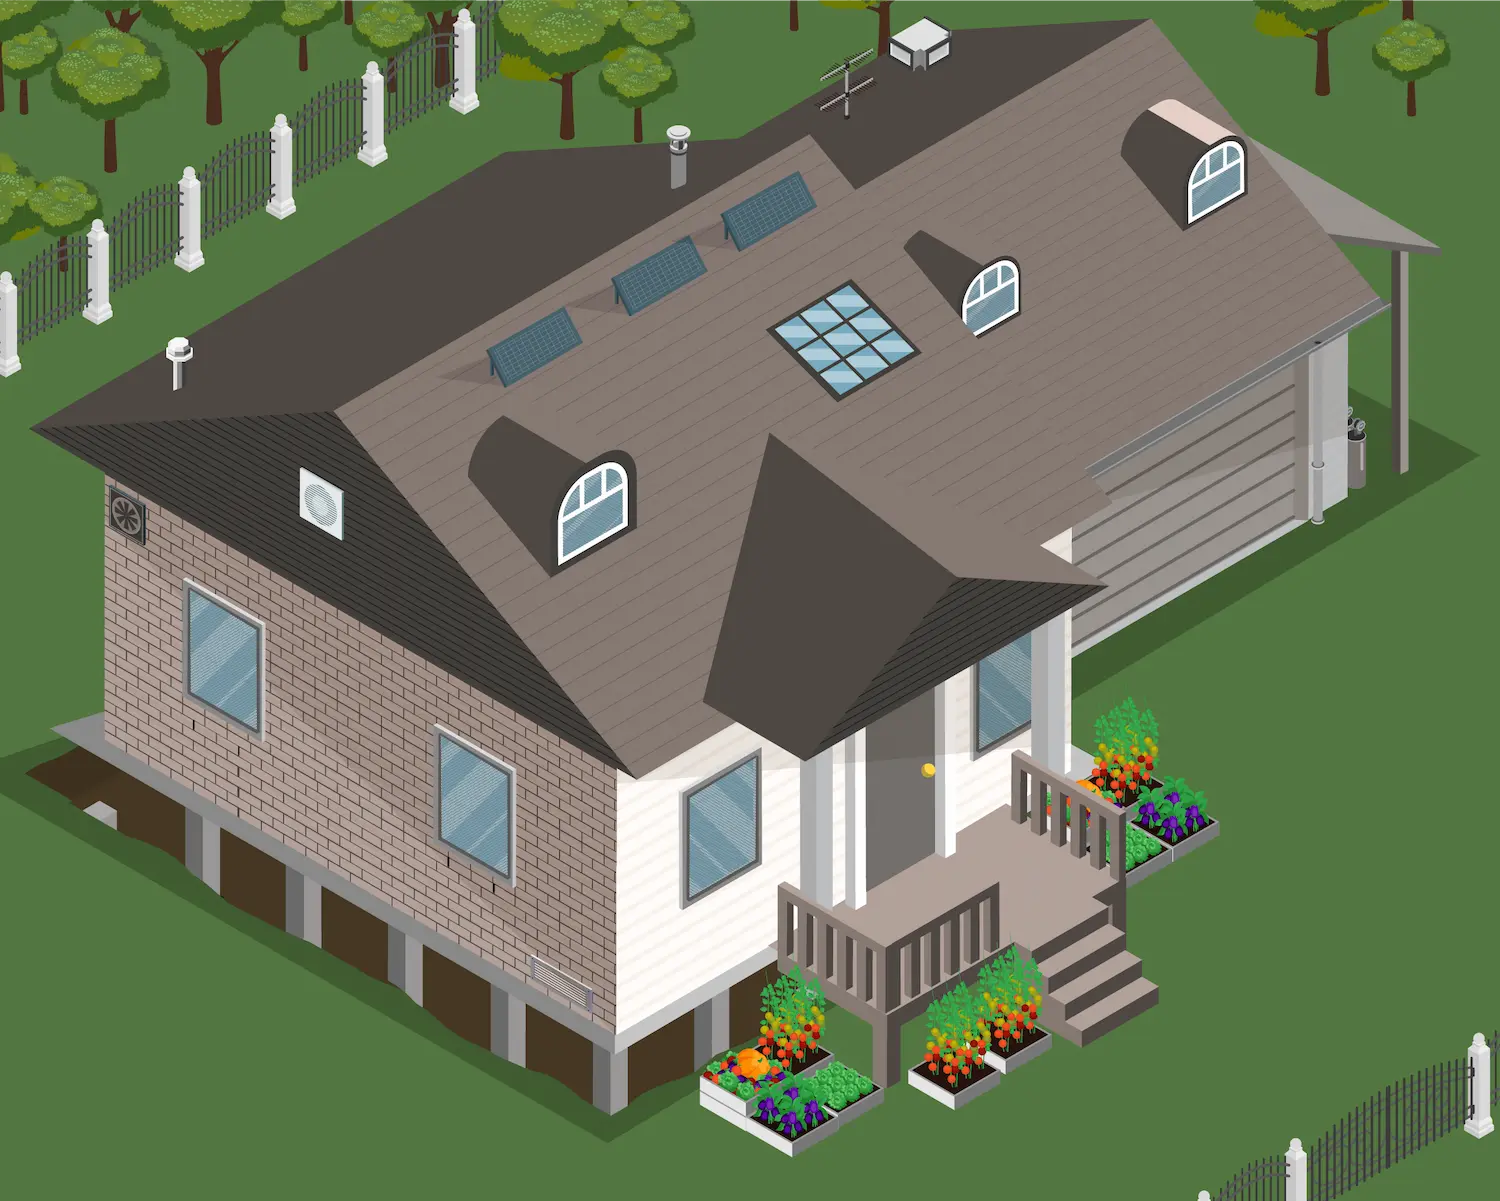
1. Subfloor & Underhouse Areas
Subfloor spaces are often exposed and overlooked. Embers can accumulate underneath the home and ignite structural elements.
Upgrade options:
- Subfloor ember meshBushfire Mesh
- Perimeter screeningBushfire Mesh
- Enclosure systems
2. Gutters & Roof Valleys
Gutters can collect debris, creating ignition points during ember attack. Burning debris combined with embers can lead to fire spreading into the roofline.
Upgrade options:
- Gutter guard meshBushfire Mesh
- Non-combustible leaf guards
- Ember-resistant gutter protection
3. Roof & Gable Vents
Open vents are one of the most common entry points for ember attack. They can enter roof cavities and ignite materials out of sight.
Upgrade options:
- Ember mesh for ventsBushfire Mesh
- Fine aperture screeningBushfire Mesh
- Retrofit vent protection systemsEave VentsUnder Eave Vents
4. Windows & Doors
Glass and gaps are vulnerable to both ember attack and radiant heat and can allow embers to enter the home.
Upgrade options:
- Ember mesh screensBushfire Mesh
- Bushfire shuttersWARRIOR BAL 40 Shutter
- Bushfire WindowsBushfire Windows
- Bushfire DoorsBushfire Doors
5. Weep Holes & Wall Openings
Small openings in brickwork can allow ember entry into wall cavities.
Upgrade options:
- Weep hole mesh insertsBushfire Mesh
- Ember guardsBushfire Mesh
6. Eaves & Roof Cavities
Open eaves and roof edges are highly exposed and directly exposed to ember attack and radiant heat.
Upgrade options:
- Eave lining protection
- Ember mesh installationEave VentsUnder Eave Vents+1 more
- Sealing solutions
7. Garage Doors & Large Openings
Gaps around garage doors can allow ember entry and increase the chance of internal ignition.
Upgrade options:
- Perimeter seals
8. Roof Penetrations & Services
Gaps and joins where services enter the roof or walls can allow heat and embers to enter.
Upgrade options:
- Sealing systems
- Fire-resistant collars
- Protective meshBushfire Mesh
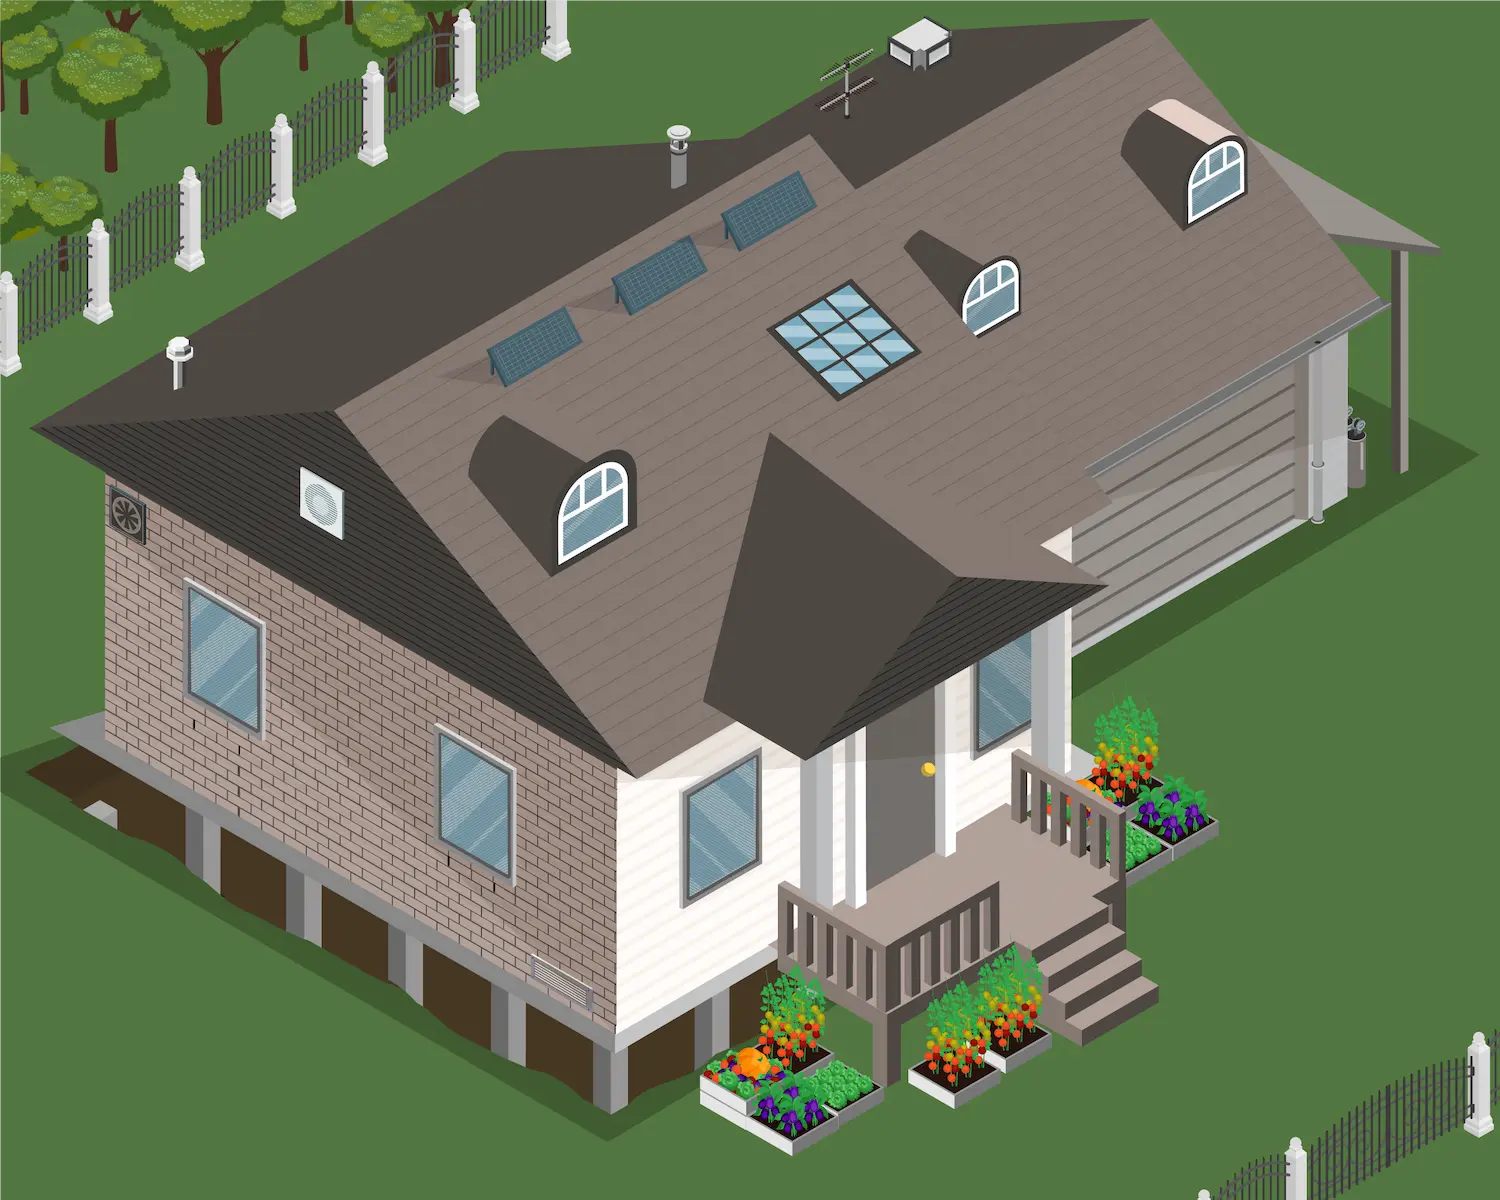
1. Subfloor & Underhouse Areas
Subfloor spaces are often exposed and overlooked. Embers can accumulate underneath the home and ignite structural elements.
Upgrade options:
- Subfloor ember meshBushfire Mesh
- Perimeter screeningBushfire Mesh
- Enclosure systems
2. Gutters & Roof Valleys
Gutters can collect debris, creating ignition points during ember attack. Burning debris combined with embers can lead to fire spreading into the roofline.
Upgrade options:
- Gutter guard meshBushfire Mesh
- Non-combustible leaf guards
- Ember-resistant gutter protection
3. Roof & Gable Vents
Open vents are one of the most common entry points for ember attack. They can enter roof cavities and ignite materials out of sight.
Upgrade options:
- Ember mesh for ventsBushfire Mesh
- Fine aperture screeningBushfire Mesh
- Retrofit vent protection systemsEave VentsUnder Eave Vents
4. Windows & Doors
Glass and gaps are vulnerable to both ember attack and radiant heat and can allow embers to enter the home.
Upgrade options:
- Ember mesh screensBushfire Mesh
- Bushfire shuttersWARRIOR BAL 40 Shutter
- Bushfire WindowsBushfire Windows
- Bushfire DoorsBushfire Doors
5. Weep Holes & Wall Openings
Small openings in brickwork can allow ember entry into wall cavities.
Upgrade options:
- Weep hole mesh insertsBushfire Mesh
- Ember guardsBushfire Mesh
6. Eaves & Roof Cavities
Open eaves and roof edges are highly exposed and directly exposed to ember attack and radiant heat.
Upgrade options:
- Eave lining protection
- Ember mesh installationEave VentsUnder Eave Vents+1 more
- Sealing solutions
7. Garage Doors & Large Openings
Gaps around garage doors can allow ember entry and increase the chance of internal ignition.
Upgrade options:
- Perimeter seals
8. Roof Penetrations & Services
Gaps and joins where services enter the roof or walls can allow heat and embers to enter.
Upgrade options:
- Sealing systems
- Fire-resistant collars
- Protective meshBushfire Mesh
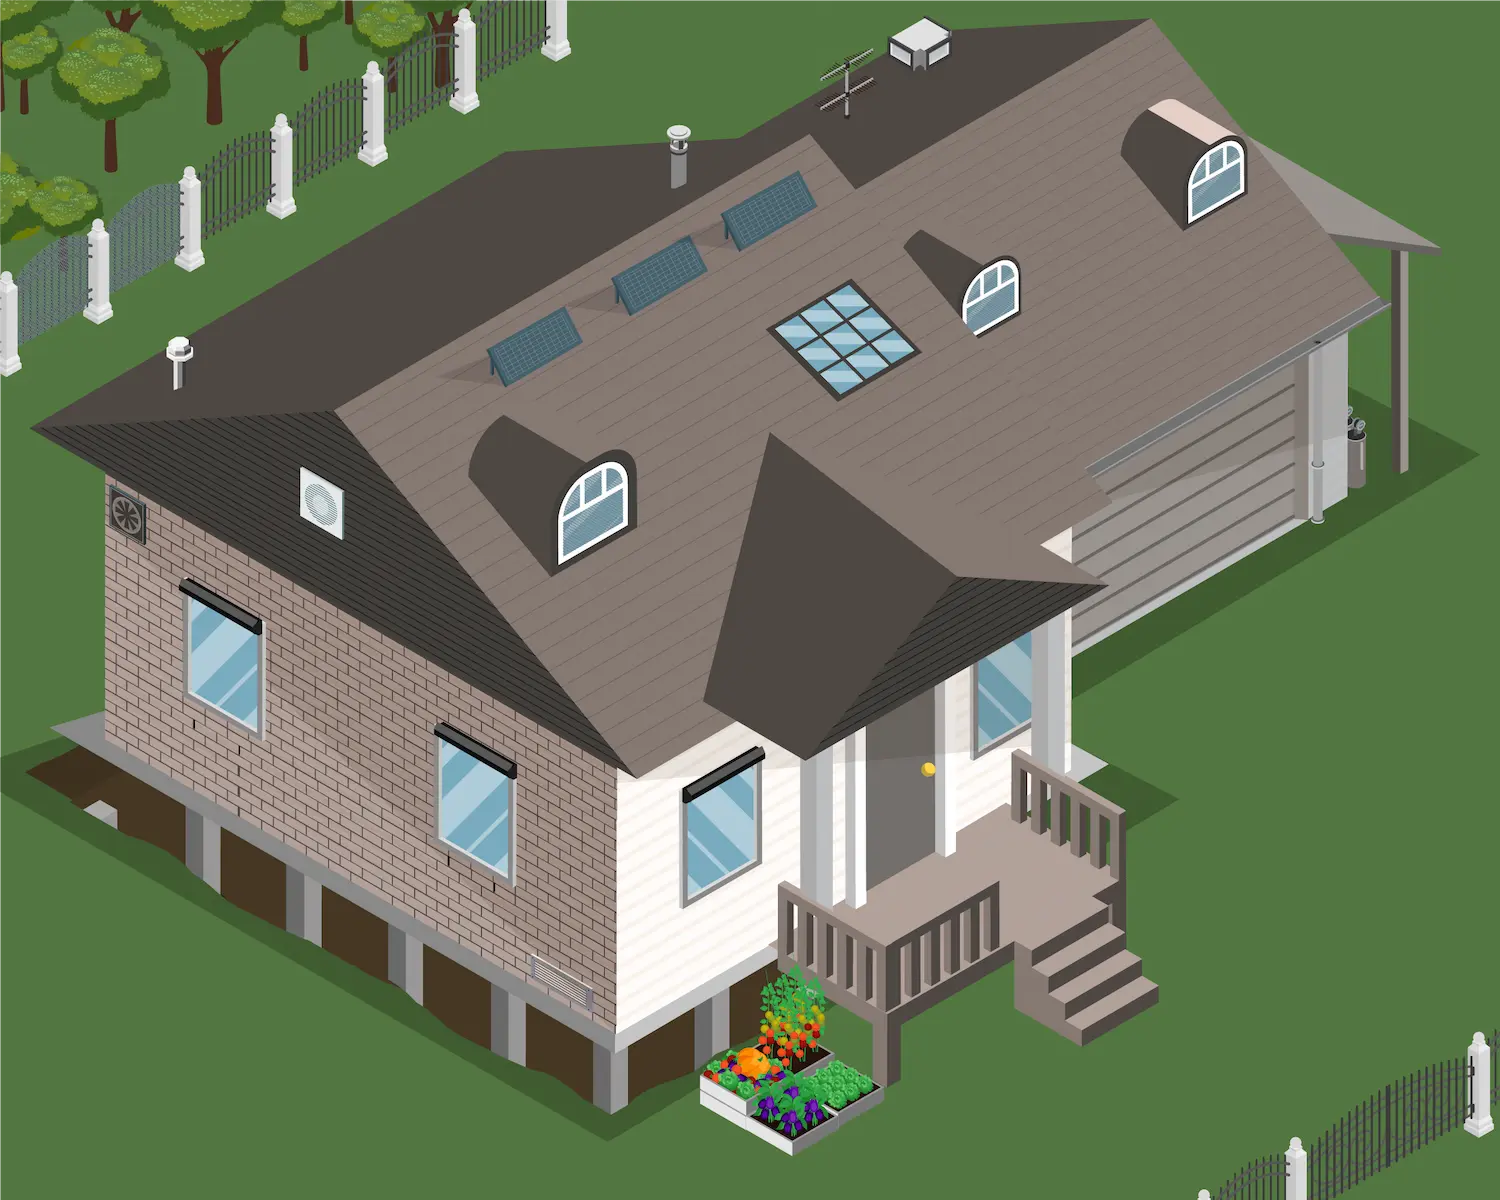
1. Subfloor & Underhouse Areas
Subfloor spaces are often exposed and overlooked. Embers can accumulate underneath the home and ignite structural elements.
Upgrade options:
- Subfloor ember meshBushfire Mesh
- Perimeter screeningBushfire Mesh
- Enclosure systems
2. Gutters & Roof Valleys
Gutters can collect debris, creating ignition points during ember attack. Burning debris combined with embers can lead to fire spreading into the roofline.
Upgrade options:
- Gutter guard meshBushfire Mesh
- Non-combustible leaf guards
- Ember-resistant gutter protection
3. Roof & Gable Vents
Open vents are one of the most common entry points for ember attack. They can enter roof cavities and ignite materials out of sight.
Upgrade options:
- Ember mesh for ventsBushfire Mesh
- Fine aperture screeningBushfire Mesh
- Retrofit vent protection systemsEave VentsUnder Eave Vents
4. Windows & Doors
Glass and gaps are vulnerable to both ember attack and radiant heat and can allow embers to enter the home.
Upgrade options:
- Ember mesh screensBushfire Mesh
- Bushfire shuttersWARRIOR BAL 40 Shutter
- Bushfire WindowsBushfire Windows
- Bushfire DoorsBushfire Doors
5. Weep Holes & Wall Openings
Small openings in brickwork can allow ember entry into wall cavities.
Upgrade options:
- Weep hole mesh insertsBushfire Mesh
- Ember guardsBushfire Mesh
6. Eaves & Roof Cavities
Open eaves and roof edges are highly exposed and directly exposed to ember attack and radiant heat.
Upgrade options:
- Eave lining protection
- Ember mesh installationEave VentsUnder Eave Vents+1 more
- Sealing solutions
7. Garage Doors & Large Openings
Gaps around garage doors can allow ember entry and increase the chance of internal ignition.
Upgrade options:
- Perimeter seals
8. Roof Penetrations & Services
Gaps and joins where services enter the roof or walls can allow heat and embers to enter.
Upgrade options:
- Sealing systems
- Fire-resistant collars
- Protective meshBushfire Mesh
9. Boundary Control
Walls and openings close to a property boundary can be exposed to fire spreading from neighbouring structures, fences and vegetation. Openings near a boundary may need additional protection.
Upgrade options:
- Boundary control shuttersBoundary Control Shutters
- Ember meshBushfire Mesh
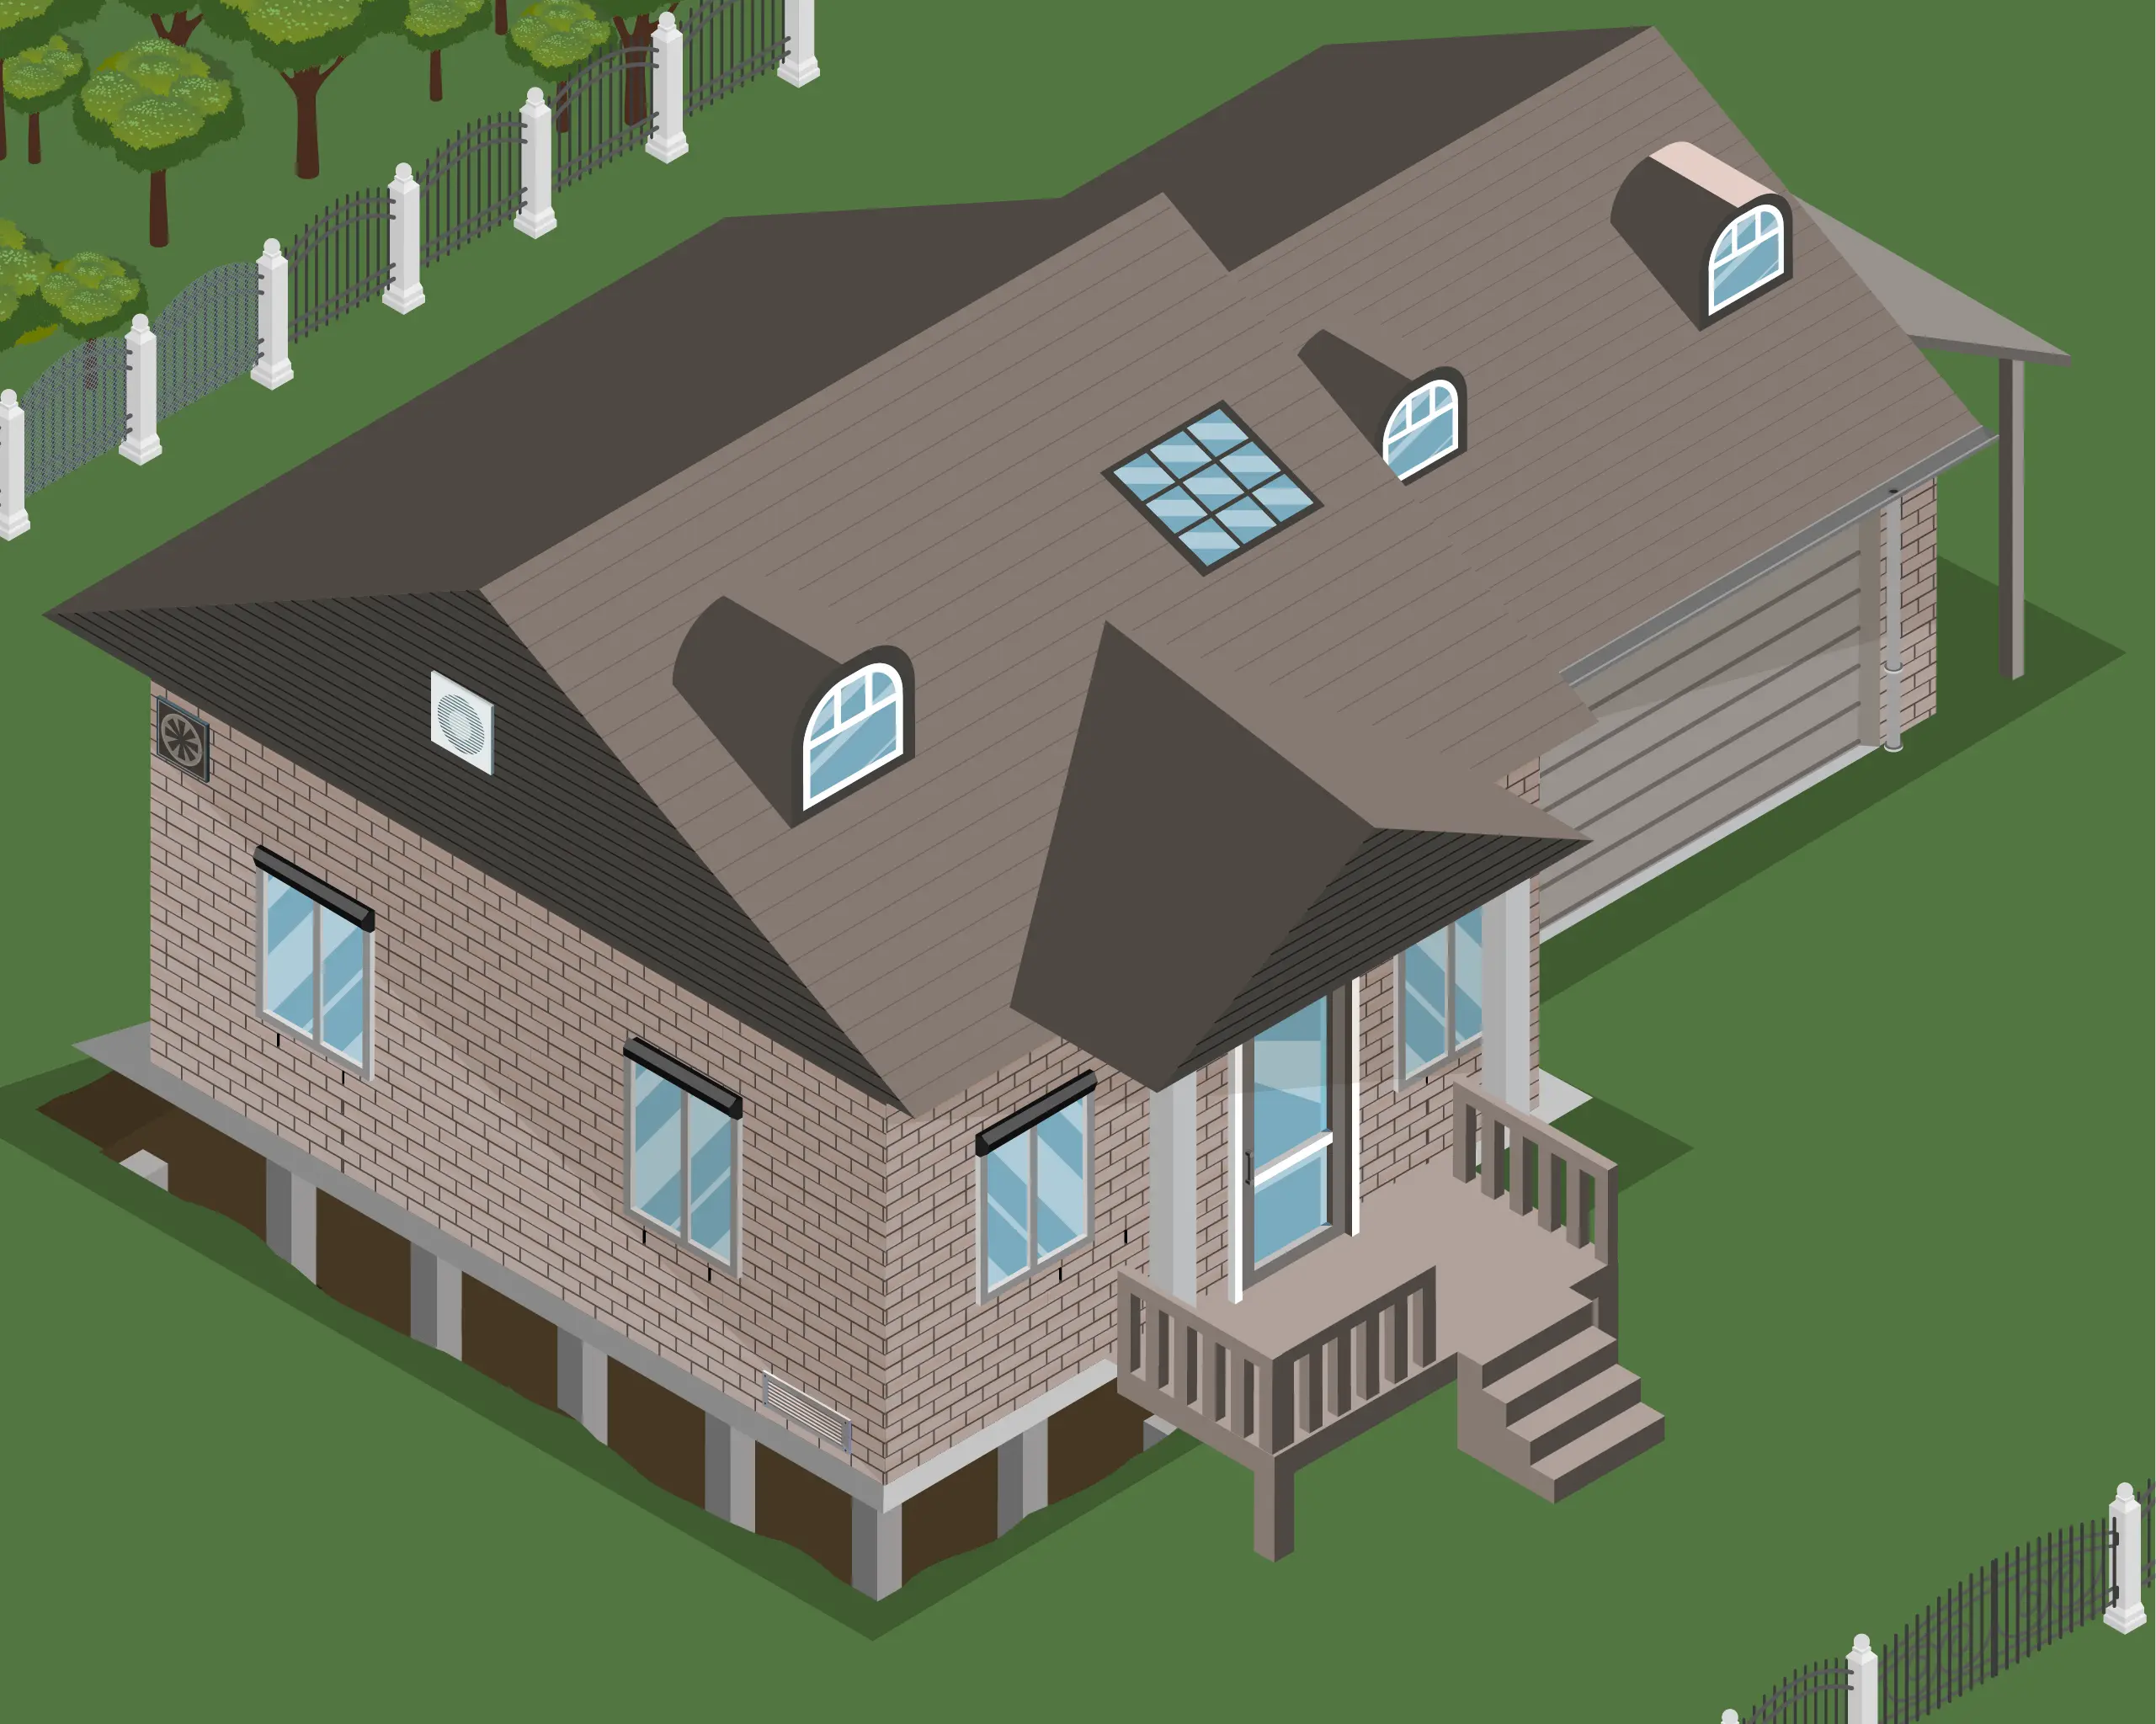
1. Subfloor & Underhouse Areas
Subfloor spaces are often exposed and overlooked. Embers can accumulate underneath the home and ignite structural elements.
Upgrade options:
- Subfloor ember meshBushfire Mesh
- Perimeter screeningBushfire Mesh
- Enclosure systems
2. Gutters & Roof Valleys
Gutters can collect debris, creating ignition points during ember attack. Burning debris combined with embers can lead to fire spreading into the roofline.
Upgrade options:
- Gutter guard meshBushfire Mesh
- Non-combustible leaf guards
- Ember-resistant gutter protection
3. Roof & Gable Vents
Open vents are one of the most common entry points for ember attack. They can enter roof cavities and ignite materials out of sight.
Upgrade options:
- Ember mesh for ventsBushfire Mesh
- Fine aperture screeningBushfire Mesh
- Retrofit vent protection systemsEave VentsUnder Eave Vents
4. Windows & Doors
Glass and gaps are vulnerable to both ember attack and radiant heat and can allow embers to enter the home.
Upgrade options:
- Ember mesh screensBushfire Mesh
- Bushfire shuttersWARRIOR FZ Manual ShutterWARRIOR FZ Motorised Shutter+2 more
- Bushfire WindowsBAL FZ [Flame Zone] Fixed WindowsFZ Operable Windows+1 more
- Bushfire DoorsBushfire DoorsFZ Hinged Doors
5. Weep Holes & Wall Openings
Small openings in brickwork can allow ember entry into wall cavities.
Upgrade options:
- Weep hole mesh insertsBushfire Mesh
- Ember guardsBushfire Mesh
6. Eaves & Roof Cavities
Open eaves and roof edges are highly exposed and directly exposed to ember attack and radiant heat.
Upgrade options:
- Eave lining protection
- Ember mesh installationEave VentsUnder Eave Vents+1 more
- Sealing solutions
7. Garage Doors & Large Openings
Gaps around garage doors can allow ember entry and increase the chance of internal ignition.
Upgrade options:
- Perimeter seals
8. Roof Penetrations & Services
Gaps and joins where services enter the roof or walls can allow heat and embers to enter.
Upgrade options:
- Sealing systems
- Fire-resistant collars
- Protective meshBushfire Mesh
9. Boundary Control
Walls and openings close to a property boundary can be exposed to fire spreading from neighbouring structures, fences and vegetation. Openings near a boundary may need additional protection.
Upgrade options:
- Boundary control shuttersBoundary Control Shutters
- Ember meshBushfire Mesh
Upgrading your entire home may not always be practical or cost-effective. Depending on your property's Bushfire Attack Level (BAL) and the applicable requirements of Australian Standard AS 3959, some areas may need greater protection than others.
Particular attention should be given to the most vulnerable areas first, such as underfloor spaces where debris can accumulate and embers may enter and ignite combustible materials. Bushfire exposure can also vary across different sides of a property, depending on its location, surrounding vegetation and terrain.
A qualified Bushfire Consultant can assess your property's individual risks, explain the relevant requirements and help you identify where additional protection may be most beneficial.
For older or existing homes, upgrading every part of the building to full BAL-FZ specifications may not always be practical or possible. However, you can still work towards a higher level of protection by identifying the most vulnerable areas and upgrading them with appropriately tested Flame Zone products where possible. A qualified Bushfire Consultant can help you understand where the greatest risks are and which upgrades should be prioritised.
Upgrade Guide — Each Area of Your Home
1Subfloor & Underhouse Areas
Subfloor spaces are often exposed and overlooked. Embers can accumulate underneath the home and ignite structural elements.
Upgrade options:
- Subfloor ember mesh
- Perimeter screening
- Enclosure systems
2Gutters & Roof Valleys
Gutters can collect debris, creating ignition points during ember attack. Burning debris combined with embers can lead to fire spreading into the roofline.
Upgrade options:
- Gutter guard mesh
- Non-combustible leaf guards
- Ember-resistant gutter protection
3Roof & Gable Vents
Open vents are one of the most common entry points for ember attack. They can enter roof cavities and ignite materials out of sight.
Upgrade options:
- Ember mesh for vents
- Fine aperture screening
- Retrofit vent protection systems
4Windows & Doors
Glass and gaps are vulnerable to both ember attack and radiant heat and can allow embers to enter the home.
Upgrade options:
- Ember mesh screens
- Bushfire shutters
- Bushfire Windows
- Bushfire Doors
5Weep Holes & Wall Openings
Small openings in brickwork can allow ember entry into wall cavities.
Upgrade options:
- Weep hole mesh inserts
- Ember guards
6Eaves & Roof Cavities
Open eaves and roof edges are highly exposed and directly exposed to ember attack and radiant heat.
Upgrade options:
- Eave lining protection
- Ember mesh installation
- Sealing solutions
7Garage Doors & Large Openings
Gaps around garage doors can allow ember entry and increase the chance of internal ignition.
Upgrade options:
- Perimeter seals
8Roof Penetrations & Services
Gaps and joins where services enter the roof or walls can allow heat and embers to enter.
Upgrade options:
- Sealing systems
- Fire-resistant collars
- Protective mesh
9Boundary Control
Walls and openings close to a property boundary can be exposed to fire spreading from neighbouring structures, fences and vegetation. Openings near a boundary may need additional protection.
Upgrade options:
- Boundary control shutters
- Ember mesh


